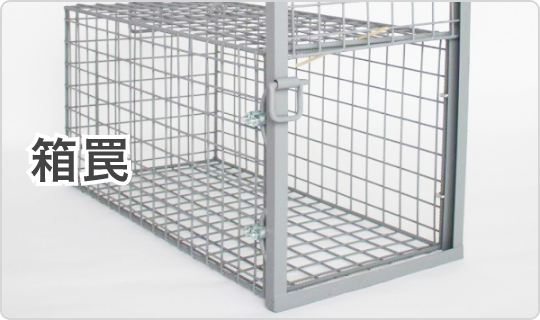
箱罠
箱罠
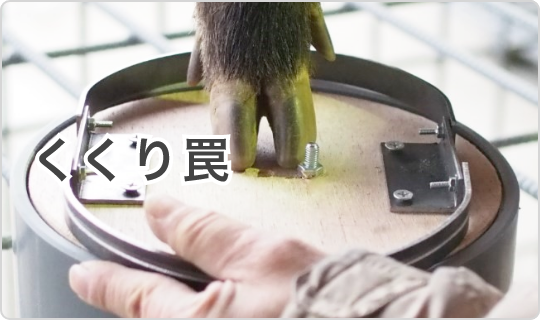
 くくり罠
くくり罠
 パーツ類
パーツ類
 電気柵
電気柵
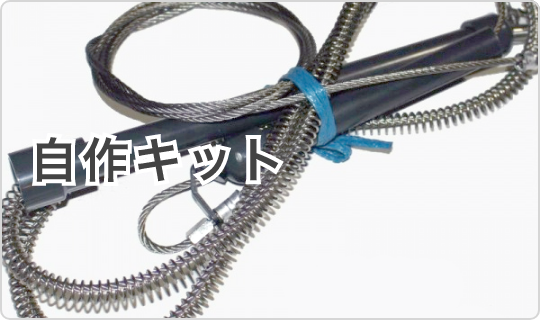
 自作キット
自作キット
 防獣グッズ
防獣グッズ
 監視カメラ
監視カメラ
However, for those who assemble for the first time, there may be some parts that are difficult to understand with only the enclosed instruction manual.
Once you get used to it, you can assemble it in about 20 minutes.
Here, we will introduce the tips of assembly with photos and videos so that even beginners can shorten the assembly time.
* Specifications as of February 2018. Improvements are made daily, so details may differ from the actual product.
Outline of how to assemble
The video below provides an overview of how to assemble. Please take a look before actually assembling.before assembly
Confirmation of parts
First, check to see if there are any missing parts for the box trap.▼Components of both doors

▼Single door components

Preparation of assembly tools
Prepare tools for tightening hexagon bolts, such as ratchet spanners and torque wrenches.Considering the efficiency of work, we recommend the electric type.

Notes
Pay attention to the direction of the rebar
Each panel has a front and back. Please refer to the pictures below.
Be careful with the door
Be careful not to injure yourself by accidentally dropping the door.Please refer to the following video for how to use the safety stopper to prevent accidental drops.
As you can see in the video, when opening the door, lift the door while raising the handle of the " prey escape prevention lock mechanism ".
When opening the door to prepare the internal gimmicks or sprinkle food, be sure to set the safety stopper to prevent the door from falling.
When assembling the door panel, the door may slide down or sideways and cause injury, so be careful not to let the door slip.
Assembly tips
*In the following photos, one person is working, but for safety, two or more people are required to assemble.First, place the bottom panel on the ground, then place one door panel and one side panel as shown in the picture below.
Please pay attention to the front and back of the panel. Also, if the panel falls during assembly, you may be injured.
 In this state, temporarily tighten the wire clip by hand, and then use a tool to fully tighten it (see the video at the beginning).
 First, fix the side wall panel and door panel on one side with three wire clips.
 Next, secure the bottom panel and side panels with a total of 3 wire clips per side.
In order to assemble it efficiently, it is a good idea to adjust the position each time when temporarily tightening so that the mesh pitch of each panel is aligned.
The side wall panel is fixed by placing it on the long bar of the bottom panel as shown in the photo below.
 At this point, each panel is secured to prevent it from tipping over, making your job easier.
The side wall panels will sag a little until they are all fixed, but fix them with wire clips while correcting them by hand.
Next, in the case of double doors, fix the other door panel, and in the case of a single door, fix the rear panel.

Single door rear panel installation
When fixing the rear panel on a single door, fix it with 3 wire clips per side.
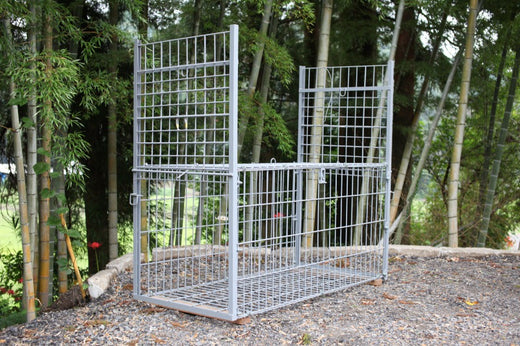
 Finally, put the top panel on top and fix it with a wire clip.
Top panel mounting point
The top panel is reinforced with angles to prevent the beast from lifting it.Make sure there is an angle between the door panel and side panel before fixing the top panel with wire clips.

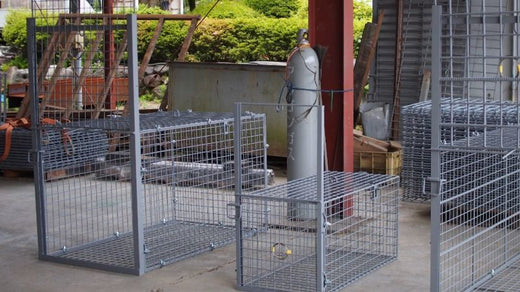
 If the product is to be transported in an assembled state, it should be carried by 5 to 6 people, or by using heavy machinery such as a crane.
  We will include an instruction manual with your purchase, but we hope that you can refer to this article and reduce the trouble of assembling.
 box trap
 tying trap
 enclosure trap
 Prevention and avoidance goods
 鳥獣追い払い用品
 electric fence
 trap surveillance camera
 transportation goods
 Trap detection sensor
 hunting supplies
 hunting books
 Anti-bird goods
 Agricultural materials/machinery
 boar
boar
 deer
deer
 Kyon
Kyon
 monkey
 raccoon
 Badger
 palm civet
 raccoon dog
 nutria
 mouse or rat
 Mole
Mole
 bear
bear
 pigeon
 Crow
Crow