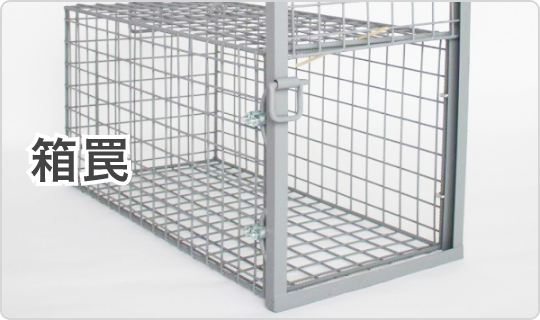
箱罠
箱罠
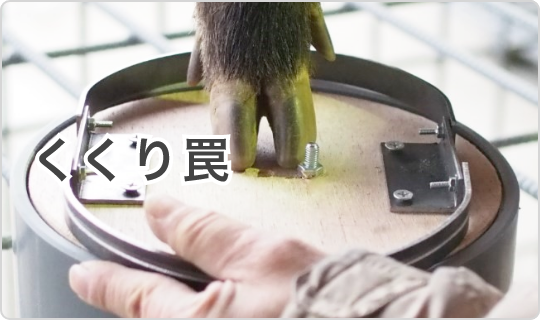
 くくり罠
くくり罠
 パーツ類
パーツ類
 電気柵
電気柵
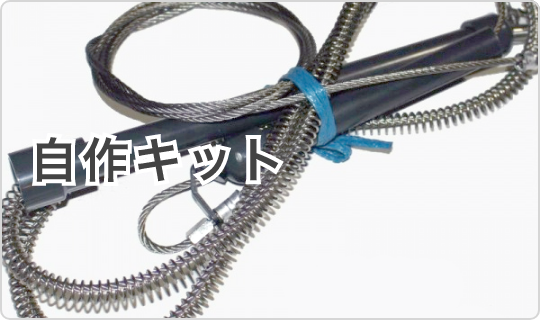
 自作キット
自作キット
 防獣グッズ
防獣グッズ
 監視カメラ
監視カメラ

Things to prepare
Introduces the necessary tools and tools for assembling a kukuri trap. This time, we will explain the "flip-up type" that uses a push spring, which is the most popular type of tying trap.① Necessary tools, etc.
1: Cutter for cutting wire rope
Prepare a special cutter to cut the wire rope. Be sure to prepare one that matches the diameter of the wire to be cut.

If you try to forcibly cut the wire rope with pliers that are not suitable for cutting the wire rope, the blade may be damaged, the strands of the wire rope may become mangled, or you may not be able to cut it properly, so be sure to use a wire rope cutting tool. .
2: Swager for crimping the sleeve (clamp)
When making a tying trap, there will be places where you need to process the stump of the wire rope or make a loop. In such cases, it is necessary to caulk the wire rope using a sleeve (clamp).

Again, use the one that is adapted to the wire diameter to be crimped. There is also a type in which the cutter and swager are integrated, which is convenient ( see the sales page here ).
3: Drill
It is a drill for processing PVC pipes for storing compressed springs. It is used for work such as opening a hole in the PVC cap for passing the wire. A handy type electric drill is fine, but a desktop drilling machine is the best, as there is a risk of injury due to shaking.
*Although there is a stand for attaching a handy type, tabletop drilling machines are not that expensive, so we recommend using a tabletop drilling machine for those on a budget.

4: pliers
It is convenient to have pliers for pulling when processing the wire.5: Gloves
If you handle wires with bare hands, your hands may get black and dirty, or you may find yourself covered in blood when the wires stick into your hands. Protect your hands with gloves when handling wires.
The cloth type is difficult to work with, so we recommend using a polyurethane-coated nylon material.
6: Saw
Used for cutting PVC pipes, etc. Considering workability, a tabletop circular saw is the best. The price is a little on the high side, but a cheap one for woodworking is enough.

②Prepare the parts for the tying trap
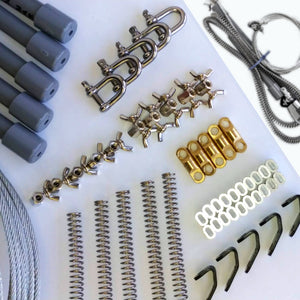
Kukuri Trap consists of the following parts. The necessary materials will change depending on your preference, but if you have the following, you can create it without problems.
Components of a tying trap

In addition, there are various rules when catching wild boars and deer, and there are some points that must be taken into consideration when making a tying trap.
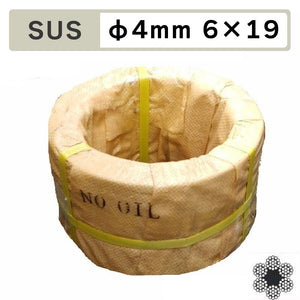
▶ Wire ropes with a diameter smaller than 4 mm cannot be used. Be sure to use one with a diameter of 4 mm or more.
Reference article
I want to know more about the wire of the tying trap>>▶ Twisting (Sarkan) is a part to reduce twisting of the wire rope, but the use of tying traps without this is prohibited.
▶ A stopper (anti-tightening fitting) must be attached to the loop (snare) that binds the leg of the animal to prevent excessive tightening of the leg.
▶ The diameter of the tying trap may be restricted depending on the region. If the diameter (the diameter of the part where the snare is attached to the footboard, or the smaller diameter in the case of an oval shape) exceeds 12 cm, use is prohibited in some areas.
In advance, let's check with the local government etc. about restrictions in the area where you will capture.
How to make a tying trap
Now, I will explain how to make the spring part from here. We will explain using the wire diameter of 4 mm and the spring diameter of 12.4 mm sold at our store.1: Cut the wire

Cut the wire rope to the required length. With the untwisted as the starting point, prepare a total of 2 wire ropes: 1 wire rope for the strut side and 1 wire rope for the snare side.
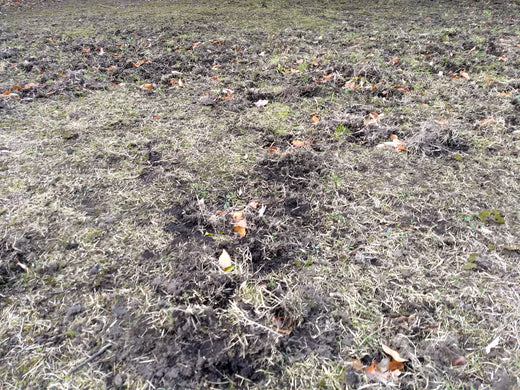
The length of wire you need depends on how big you want your snare to be. If it is too short, it will be difficult to attach the wire to the rail of the tread when setting it, and if it is too long, the range of motion of the captured animal will be widened and the wire will be more likely to twist.
If it's less than 2 meters, I don't think it would be a problem. Be careful not to mess up the edges, as this will make the next step more troublesome. If you can't unravel it, you can wrap the cut part with cellophane tape and cut it with a wire cutter to get a clean cut.
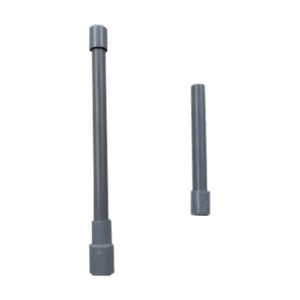
2: Prepare the PVC pipe
Drill a hole for the wire through the cap.

If you have a 4mm diameter wire rope, drilling a 6mm diameter hole should be fine. Also, cut the PVC pipe beforehand.
If you match the spring diameter of 12.4mm, the 13mm diameter of the VP tube is just right. Adjust the length of PVC to be cut according to the compression length of the spring to be used.

Prepare a combination of cut PVC and a cap with a hole, a joint with a joint, and a single cap with a hole.

3: Make the wire on the support side
Create a section to wrap the wire around the strut. Pass the wire rope through the sleeve once, pass it through the shackle to form a loop, and then pass the wire rope through the sleeve again.

Then use a swager to crimp the sleeve. Do not crimp halfway, but crimp firmly. Swagers have different caulking grooves depending on the wire diameter to which they fit. Be careful not to use grooves with different diameters.

Also, if the wire rope has a coating such as tape, remove it before caulking. If you crimp it from above the insulation, it may come off completely from the crimped part.
4: Make the snare part
Make a loop (snare) that binds the animal's legs. First crimp the stump with a sleeve. At this time, make the ring of A as small as possible so that extra resistance does not occur during operation.
After that, pass the wire through the tying fitting and the overtightening prevention fitting (stopper), make a loop, and pass the wire through the tying fitting again (see the photo below).

In addition, there are people who do not use tying metal fittings. In that case, add a little extra space to the A ring and insert a flat washer instead of the tying bracket.

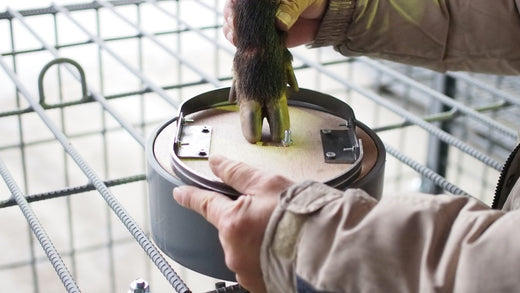
5: Prepare PVC pipes, springs, and stoppers
Pass the combination of PVC prepared in step 2 and the cap with a hole through the wire in step 4. Then pass the wire through the spring. Keeping the spring as straight as possible will prevent the wire from getting caught on the way.
After that, pass the wire through the fitting + PVC pipe and connect the cap and PVC pipe through the cap with a hole.

In addition, pass the stopper that secures the compressed spring. The stopper used here should be a type that can be firmly fixed.
6: Wear Sarkhan
Connect the wire on the strut side and the wire on the snare side with a twist (sarkan). Make sure to use a Sarkan that matches the wire diameter.

7: Final check

Check if there are any problems with the crimped part of the sleeve, if there are any missing parts, etc. If there are no problems, the spring part is complete.
8: For those who want to make their own treads
For those who are good at wood plywood and metal processing, it may be a good idea to try making your own treads, although the level of difficulty will rise considerably.

Prepare (1) a pedestal, (2) a rail to attach the snare to, (3) a plate that the beast steps on, and metal fittings to connect (2) and (3). Let's adjust the size of each part according to the regulation of the trap diameter of each region.
If there is a groove for hooking the wire on ②, it will be easier to set. Also, use a washer at the base of the rail to reduce resistance as much as possible. Be careful not to overtighten the metal fittings so that the movement of the rail is not affected.
In addition, it may be quicker to purchase a commercially available one because the step board is difficult to manufacture even in terms of equipment.
Introduction of our shop's tie-up trap
We have a wide variety of products to suit your needs.Tie-up trap finished product
It will be a set product that has already been assembled. The spring part is also included, so you can set it up as soon as it arrives.
Click here for the sales page of the finished tying trap
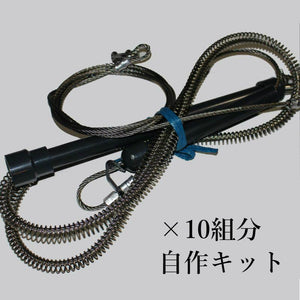
Kukuri trap DIY kit
It is a product that is a bargain set of parts necessary for self-made spring part. The PVC pipe has been processed and the wire has been cut, so you can make your own if you have a swager.
Click here for the homebrew kit sales page
tread
We have various types of treads, and they have been well received by everyone from beginners to veterans as "cheap and good catch".

![Swager (Crimping machine, wire cutter) [Hand]](http://inohoi.jp/cdn/shop/products/559168fd9a5204ad15b257e7f05fd3ed_300x300_crop_center.progressive.jpg?v=1663139566)
![Swager (Caulking machine, Wire cutter) [Desktop]](http://inohoi.jp/cdn/shop/products/11f20abc0cac57bb0401c63c01688301_300x300_crop_center.progressive.jpg?v=1663139545)
 box trap
 tying trap
 enclosure trap
 Prevention and avoidance goods
 鳥獣追い払い用品
 electric fence
 trap surveillance camera
 transportation goods
 Trap detection sensor
 hunting supplies
 hunting books
 Anti-bird goods
 Agricultural materials/machinery
 boar
boar
 deer
deer
 Kyon
Kyon
 monkey
 raccoon
 Badger
 palm civet
 raccoon dog
 nutria
 mouse or rat
 Mole
Mole
 bear
bear
 pigeon
 Crow
Crow